
Building an Agentic Marketing Team on DataStax Langflow for Google Ads Keyword Pricing, Search Term Discovery and Ad Creative Creation

DataStax’s Langflow platform is an incredibly powerful tool for building out complex and agentic AI workflows. As part of our series on the AI-Native Ad Agency Architecture, let’s dive into using Langflow to build out 3 AI-based agents that:
Act as a research assistant. Understand the “client’s” (your) needs based on a prompt and do keyword discovery and pricing research. This uses the Amicus5 Google Ads Keyword API, which you can try here on your own keywords (example if you were looking for keyword pricing around “shoes” in the US and UK, you would call : http://api.amicus5.com/ai/ads/google/keywords?&keyword=shoes&countryCodes=US,UK)
Another agent (named Harry Crane, after the Mad Men character who runs the media and television division) who identifies competitors and analyzes what competitors are doing with their ads.
And a third, genius agent based on Charlie Munger (whose system prompt is shared in this recent blog post) to take this information from the first, Peggy, agent, as well as Harry’s analysis, and then leverages various mental models and marketing best practices to recommend 20 keywords, a keyword bidding strategy, a broader marketing strategy to accompany the ad creative, as well as, of course, the ad creative itself.
How do you do this?
First, you obviously need a DataStax Langflow account (which you can create here).
Once you have an account, you will see “My Projects” as pictured below. Simply click “+ New Flow”.

You will have 3 highlighted options. I suggest opening Simple Agent. We’ll create more agents there… don’t worry.

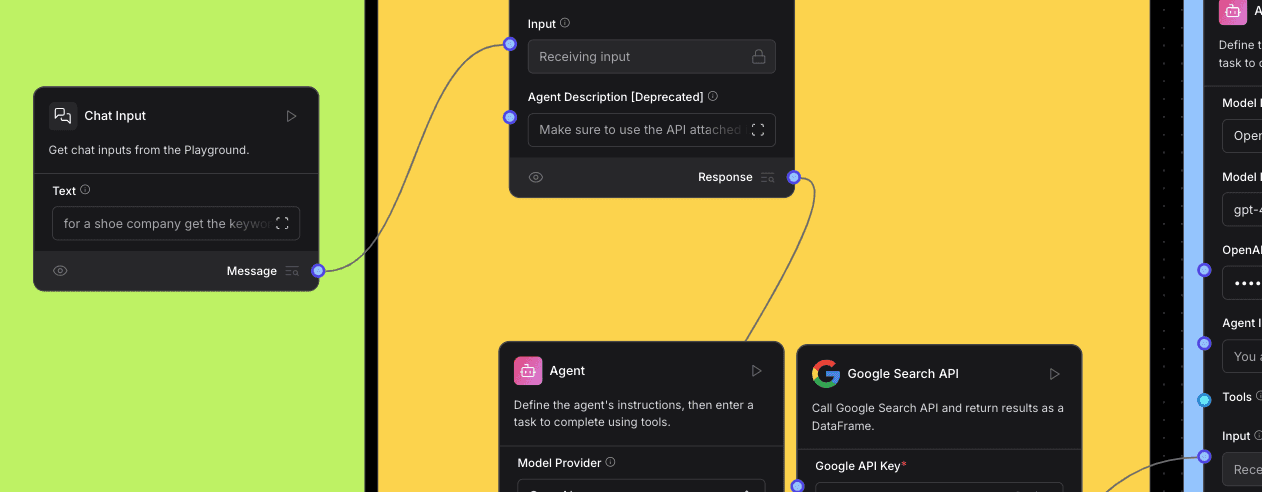
From there, you will see this template, which does an okay job at getting you familiar with the platform through a simple Langflow that takes an input (Chat Input is the bottom box). It feeds that input (blue little dot next to the “Message” button on that bottom box), to the “Input” of the main agent box. That main agent box in the middle with the pink icon on the top where it says “Add you OpenAi API key here” is your first agent. We’ll talk about customizing it soon, but it’s a good idea (not required) to go ahead and edit by clicking the box and then clicking the “Controls” tab in the bar that magically appears when you do so. We’ll get to that later. For now, we’re just browsing.

Take a few moments to try to see if you can understand all the various connections. It’s okay if you’re not getting it quite yet. It can take some time to get used to it if this is your first time working with an agentic AI development platform.
Next, we’ll click add note in the bottom right. Now, you can use these for notes, bit as you can see in the final Langflow image at the top of this blog, I like to use them more so as a background pad for sections and color coding.

Like so:

You will notice that the agent box has a “Response”text and a dot next to it. You want to get familiar with how these dots work and connect from node to node (node, as in box). I recommend playing around with and getting familiar with what you can and cannot connect. When you click a dot, it will show you what you can connect it to because dot on other nodes will pulsate and be visible when they are attachable.

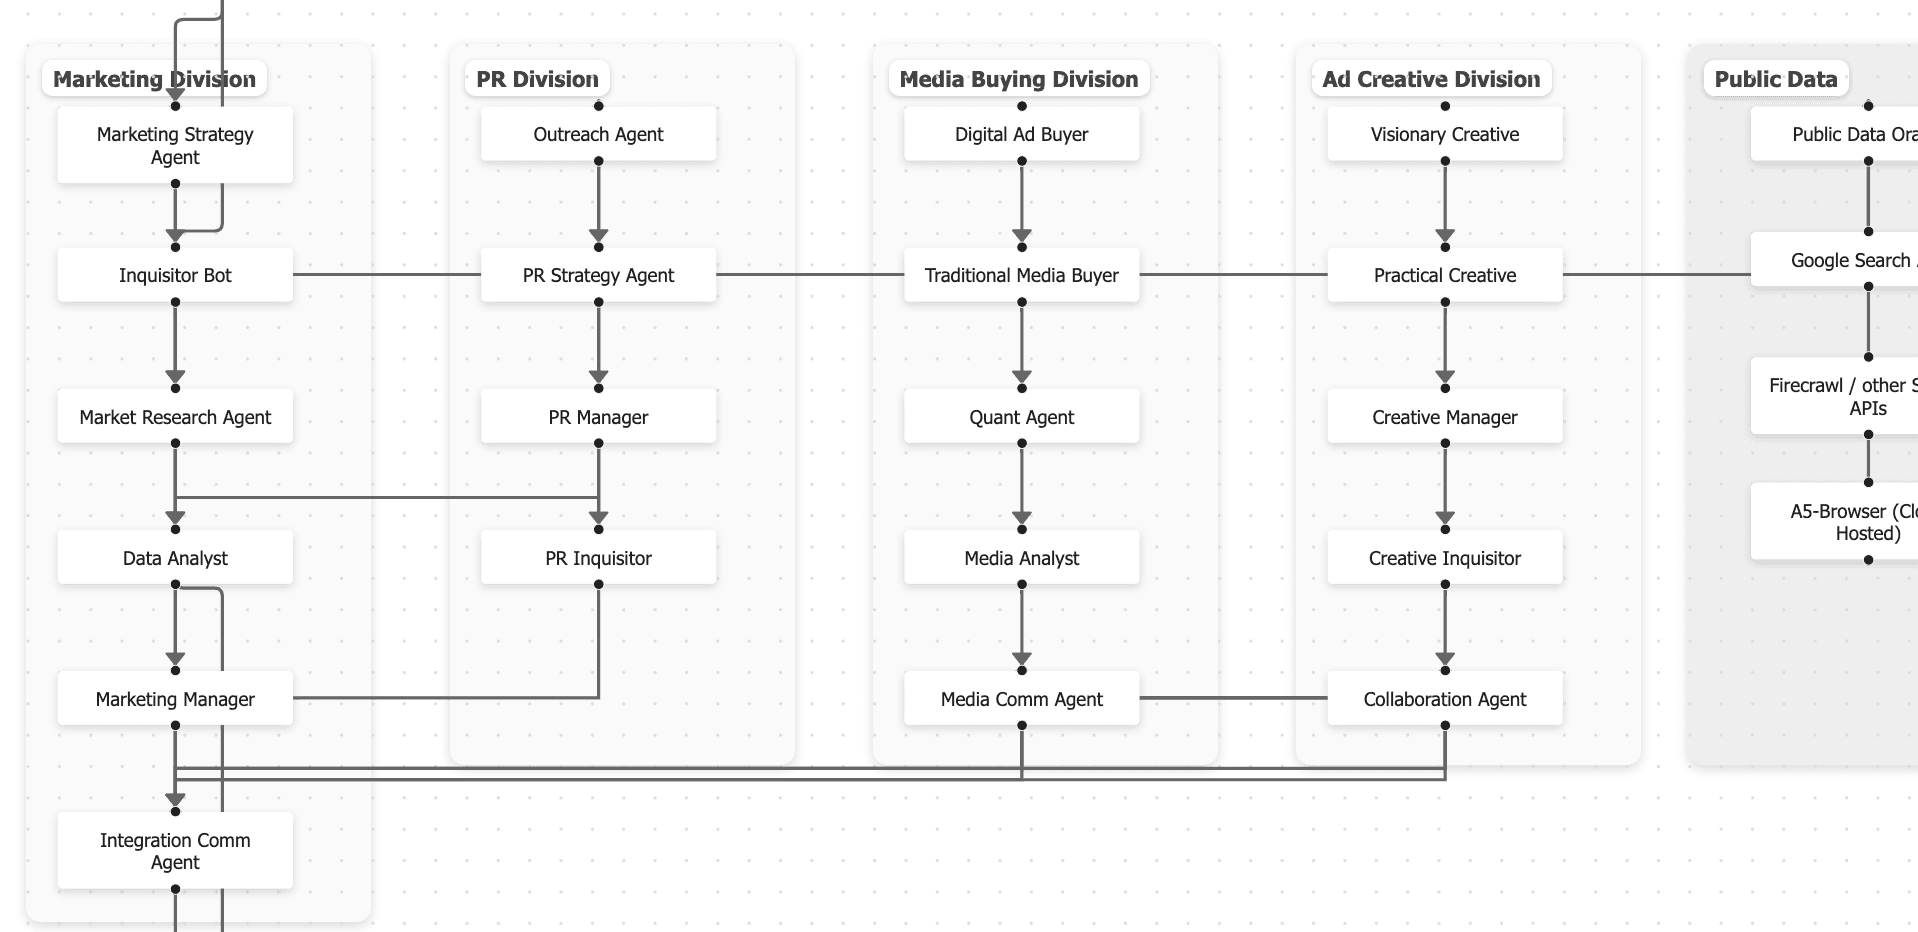
In my example, the top “Peggy” agent is part of the Media Buying team and using the Amicus Google API for keywords to get recommendations. Again, here’s an example of the output you can see for yourself: http://api.amicus5.com/ai/ads/google/keywords?&keyword=shoes&countryCodes=US,UK)
This API call node can be selected from the left-hand toolbar where you can select from the myriad of different types of nodes. The key to getting an agent node to work with an API node or other node (such as URL visit node or other integration among the myriad of them) is to instruct the system node how to use it in plain text in the System Instructions when you open up the node settings by clicking the node and clicking “Control”.

Above, you will see how to connect aResponse to an Input… Generally, all responses from a node (especially agent nodes) to another input (unless we have reached the end of the journey).

And below, you will see the “Controls” button. The agents will not be in tool mode (make sure to toggle that off, which is not really necessary because that is the default). For the “tool” nodes like the API Request node below, you will will toggle Tool Mode on so that the AI agent node can use it. Make sure to connect where it says “Toolset” to the Agents “tool”. Again you connect them by clicking the first dot on one and then clicking the corresponding dot on the other node. Boom, connected.

When you edt the agent by clicking “Controls” above the node after you click on it, you will see something like this.

The main area you want to edit is the system prompt (“Agent Instructions”) component. Give your agents personality (I like to base my agents off of popular TV or movie characters who perfored similar roles to save time on creating their personas.

After all is setup by following these instructions like the picture at the top of this post, you can click the Playground button in the upper-right-hand corner.

Here, you can send in the original input and test your creation. The error messages are pretty informative in Langflow, so stepping through issues is not a problem.
Here are a few screenshots from the output I received. Really great!


And that’s it! If you want to expose this flow as an API for another app or agentic workflow, simply click the API button in the upper right-hand corner.

And voila:

You get these great code examples. make sure to click “Generate Token” so you can include a valid token on the call. Otherwise, just enjoy your Langflow through direct interaction.
Excited to explore more workflows in the AI-Native Ad Agency Architecture.
Until next time!